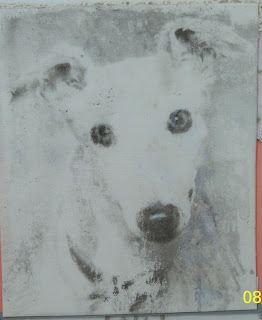
This is Grey Lady. She was my first successful transfer using gel medium. I started with an actual color photograph of this greyhound printed on cotton that I had purchased a couple of years ago from The Lonesome Pet. (She still sells many different dog breed items on eBay if you are interested.) Using my HP ink jet printer, I copied this color photograph on fabric on to a piece of plain white paper, 24 lb, 96 brightness using only black ink.
Then I laid my own piece of light tan cotton on a cookie sheet and spread on it a layer of Claudine Hellmuth Studio multi/medium matte gel. I used a plastic card, like a credit card,and spread the gel like I would put mayo on bread, a little bit thick. I put the black greyhound print on the white paper face down on to the gel-covered cotton. I burnished it with the back of a spoon to rub it in. I kept burnishing and checking it to see if it was transferring and it was. When I thought it was finished, I checked one corner to see how dark it was, then pulled off the paper. I didn't let the paper dry (that's a different method) and it all came off of the cotton.
I let this transfer dry and later mounted it on light cardboard to make the Grey Lady wall hanging, which is listed in my etsy shop. ![]()
![]()
![]()

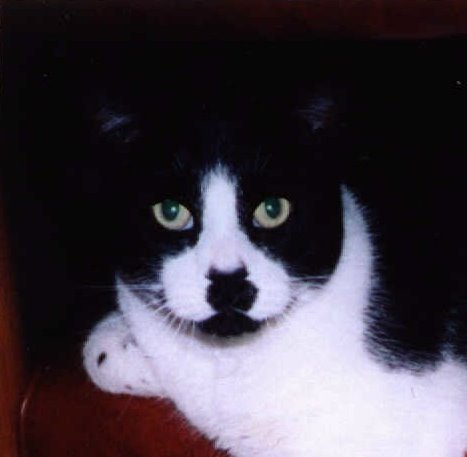
The four photos above are samples of my second transfer method - using Mod Podge. I copied a color photograph on to Burlington glossy photo paper (Kodak glossy paper works also.) I used cotton fabric again, and spread on a thin layer of Mod Podge. I didn't use quite as much of the Mod Podge as I did when I used the gel medium. I placed the copied photo face down in the Mod Podge and pressed it down very lightly. No need to burnish or rub it with a spoon. The Mod Podge will begin immediately to loosen the film of color from the photo paper. In 30 to 45 seconds, lift an edge to see if the color film is loose. When all four corners are loose, gently lift off the paper and a thin film with all the color will be left on the cotton. It won't be down into the fabric threads like with a gel transfer, but the film sits on top of the fabric. Your transfer may dry with small wrinkles or imperfections, but that adds to the uniqueness of the transfer. If it dries too glossy for your taste, carefully brush on a layer of matte gel.
Remember if your photo or clipping to be transferred includes words or numbers, print them in reverse on your printer, so they will be readable on your transfer.
Check out the rest of the transfers submitted to our challenge on the Melange blog at: http://melangeonetsy.blogspot.com/
Don't be afraid to experiment! Keep trying and invent new ways too!
Midwestie Lady - Linda B.


Great write up Linda. Your transfers are all wonderful and I thank you so much for taking the time to do this for the Melange team blog also. I know I have surely enjoyed how everyone interpreted the challenge and I have learned a lot too!
ReplyDeleteWow, really like Gray Lady! I have Mod Podge just collecting dust, so I'll have to give that method a go as well! Thanks for the great post.
ReplyDeleteGreat job on the transfers and the post , looks wonderful 1
ReplyDeletegreat transfers & blog post!
ReplyDeleteI was just reading about all the different kinds of modge podge yesterday - did you know they even have 1 that glows in the dark?